domenica 22 gennaio 2023

rubber foam, foamy: how I made Harry Potter (english post)


Hi everyone, 

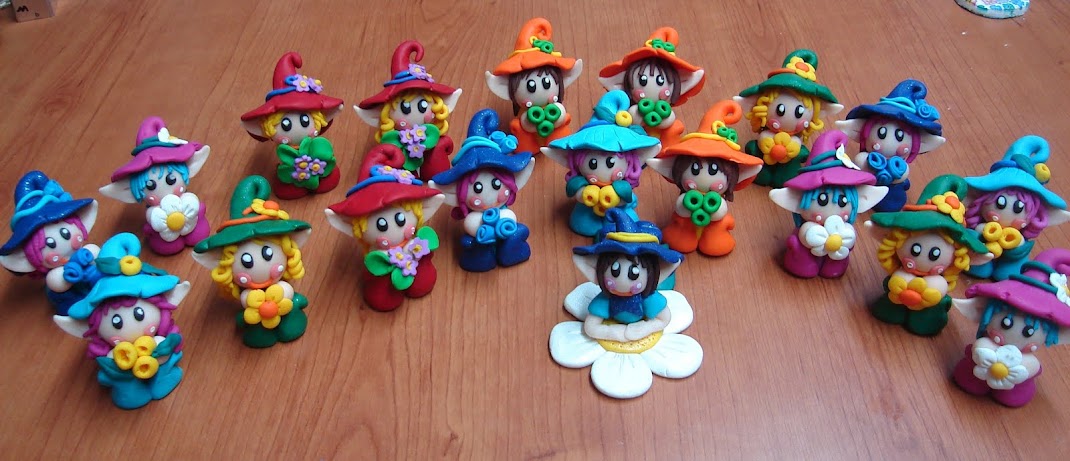
I'm back, I come back to foamy or foam rubber, musgummi, I don't know right way to call in english, anyway let's try to make a Harry Potter with this material. I'm planning to make several characters, this is a request from a follower, but very soon I'll make another very famous character, I won't tell you now who it will be.

Last time I made a single post in Italian and in English but things to say are too much I decided to make two different posts.

I start with list of material we need:

  • skin color
  • black
  • grey
  • white
  • sunflower yellow

I also added a base later with printed foam rubber, some characters, like this, have more weight on their shoulders (coat/cape), and the eggs where we are going to fix the leg is thinner, not he can stand up, a lot depends on the characters, for Conan and Arale and for other characters this problem doesn't exist but for others I necessarily had to add a base, after all even the action figures of the characters have a base... I tried to put some heels on it and I have to say that the idea works, but was still unstable, so a base is the fastest and most effective solution. An option could be to use either two spheres, one larger and one smaller, cut a small part of the dome and then cut more than half so that it has more weight and we will have a more chubby foot or use half a wooden egg to give base weight.

you also need :

  • hot glue
  • iron or hair straightener
  • cutter
  • scissors big and small
  • fine tip markers (black and red)
  • acrylic paint 
  • awl or skewer pick
  • wire
  • nippers and pliers
  • marker with large barrel (we need  it only to shape trousers
  • sphere of 5cm in diameter (1" 7/8) 
  • sphere of 3cm in diameter (1" 1/8)
  • 2 eggs 3x5cm (1" 1/8 x 1" 7/8)
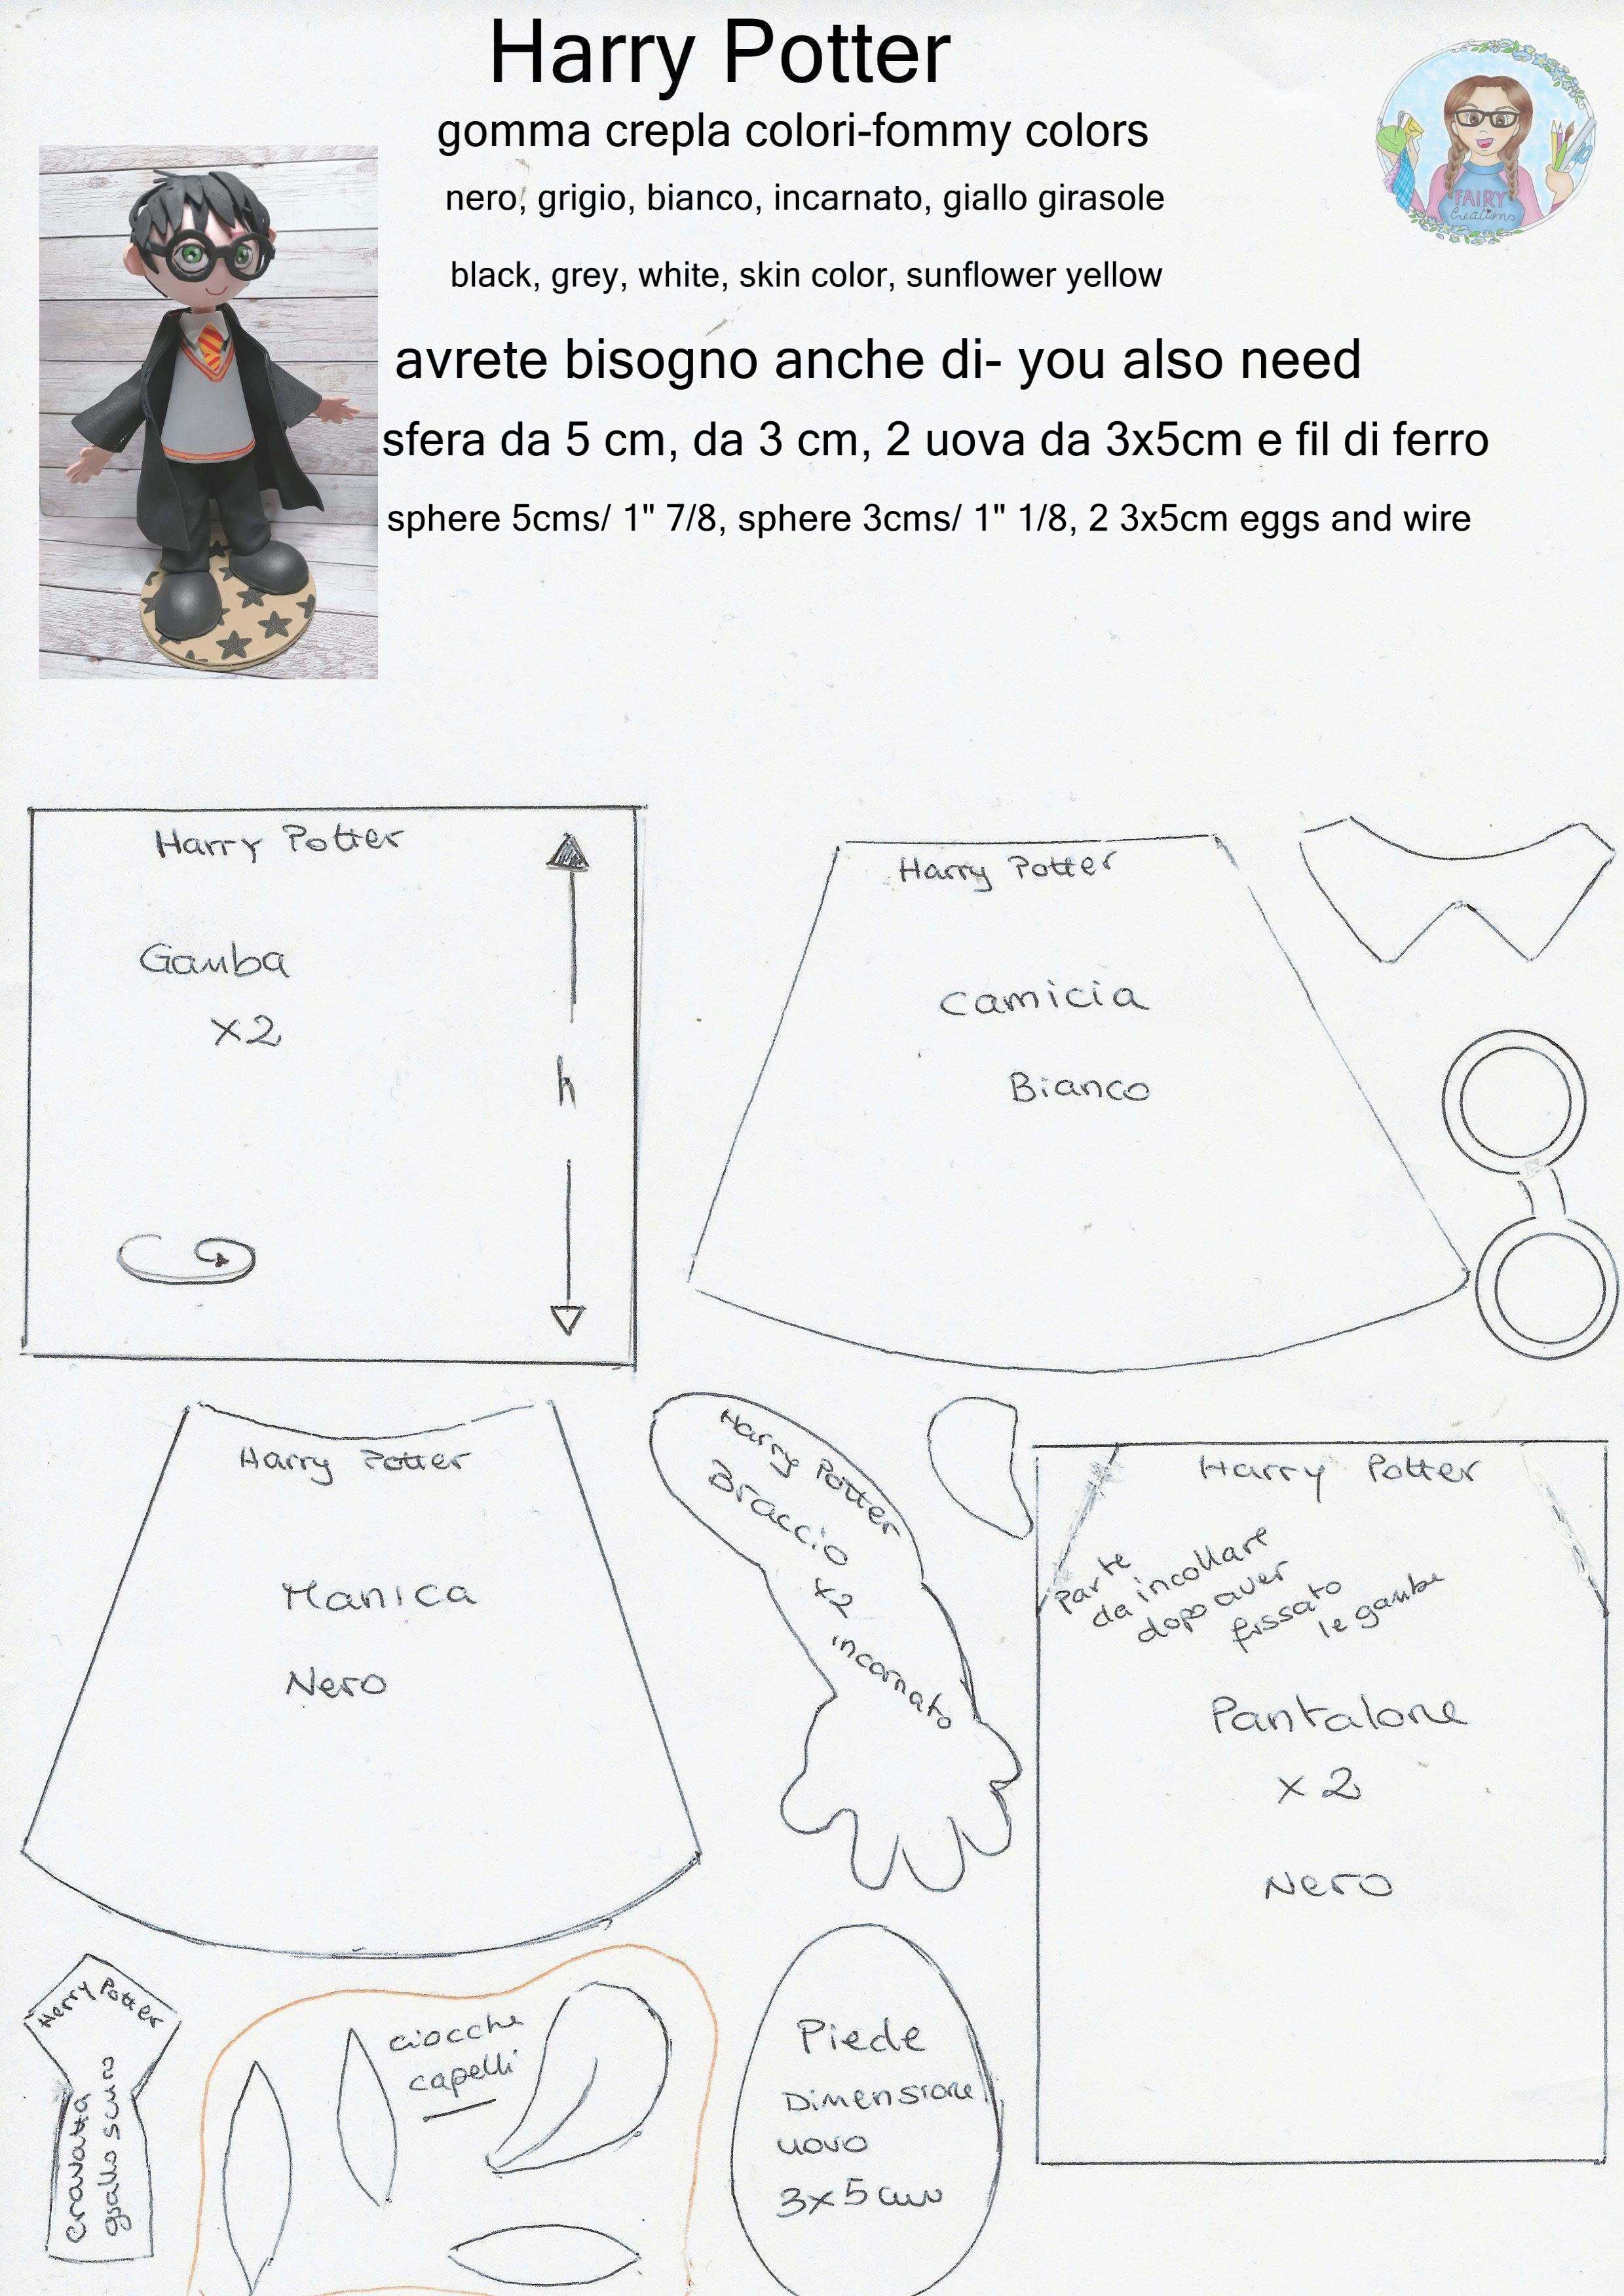
  • pattern


Every time I create a new character, I need to make a sample,  often people ask me for models that could gradually be created on their own, starting from a previous model, foam rubber as opposed to paper can be modeled more easily but for this reason it is less perfect than it, in fact every creation is absolutely original even if it realizes the same subject, the pattern or rather the cut must be arranged according to the situation.
 
In video you can see that I have a moment of difficulty fixing the legs on the sphere, as the piece of the trousers has the corners cut, in the pattern I have modified although you can see the corners of how it was before, I advise you to glue until the point where I cut the triangle and after fixing the legs glue the pelvis.

I forgot to write on the hat, piece that looks like a crown, that is the hat seen upside down, the body/neck and legs pieces go rolled up i put the "h" to indicate the height so it goes rolled up like see to the left of the pattern piece.

I always start from the feet, maybe for someone else it's better to start from the face or somewhere else, for me it's more comfortable to start from the feet and build my character. I use to cut in half egg but you can use 2 eggs and cut more than half, or 2 differnt size of balls to create feet.
Anyway it's better if you have 2 eggs, one you can cut in half and other to use ast stamp,  because when you termoform egg at the base will ruin a bit.


note about handmade mold:

I use thick card stock, the same one I use for scrapbooking album covers. I think they can make it easier for people who don't have mold, or people who never create characters who may find it a bit difficult without them. 
I noticed that each brand has some millimetres of differnt so 4cms of a brand are 4.2 for another one, so handmade moldes must be adapted or make a new one, anyway after some times you use them you must make a new one because they ruin.
Another thing I use to do when I make a character is to mark and cut all parts of our puppet. I got into this habit ("habit" or "use"?) probably because I always use the molds and try to turn on the iron as little time as possible, so when I turn on I thermoform most of the pieces that need to be thermoformed.

I never leave the iron on too much because I'm quite clumsy and between it and the hot glue it seems that they are competing to see who burns me the most, so I turn off iron for this reason and to save energy too.


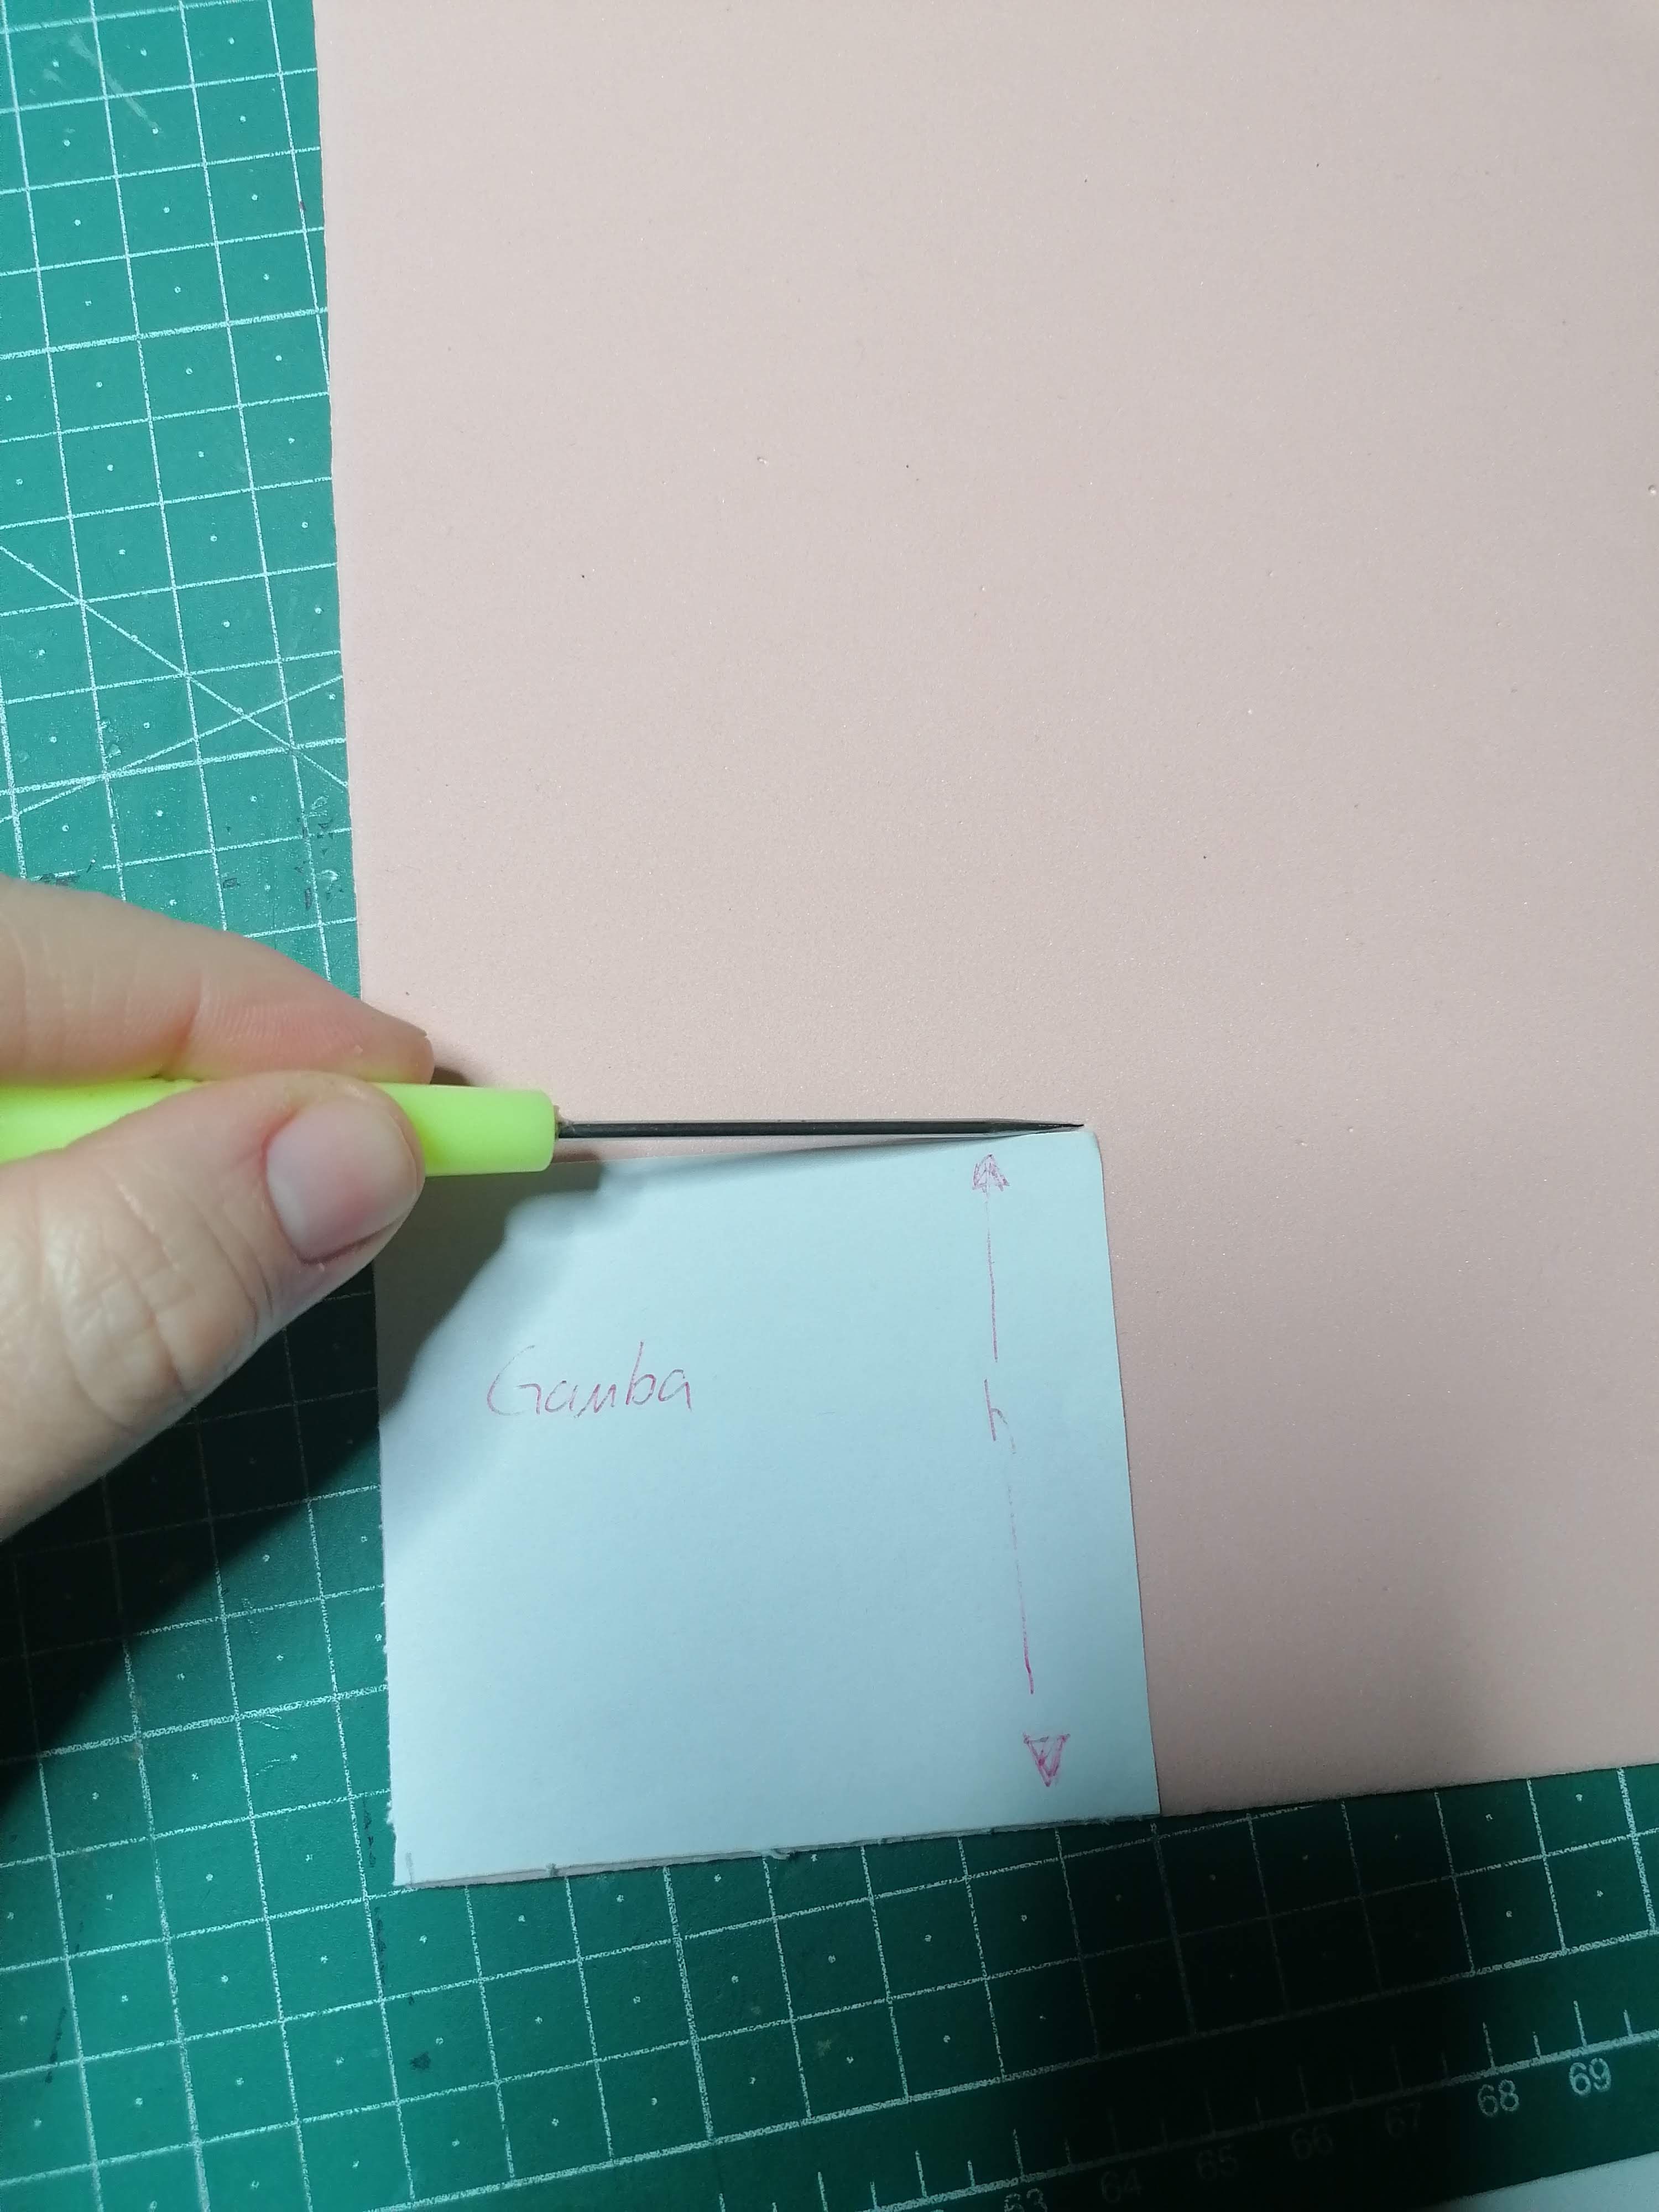
i usually make trousers snipping 2 corners up as you can see in the picture here, I think is more confortable in this case make a rectangular square without snips, because later we should add a ball to fix legs to the rest of the body, so we glue legs on sphere than we glue trousers at the high part, so leave unglued about 2cms for this reason, we'll glue them after glued legs.

I start termoforming feet, if your work is precise you can leave as it it, if there is an imperfection I usually add a little strip (0.5mm high) all around foot.


Then create the legs, rolling up as I told you before.
Cut some 11 cm pieces of wire, it must be a couple of cm more than the leg itself as one cm goes into the shoe and one or so more into the pelvis.


Smart tip: don't put the glue right at the end of the roll but 5-6mm further inside, by squeezing you won't have any glue coming out.
  For characters like this who still has his leg completely covered you can also use a different color of foam rubber, you won't see it anyway.

The moment I went to stick the leg on the foot, the roll didn't rest entirely on the foot so I cut a little diagonally, not for the version with the molds because that one has an ankle, not with the egg.


this should be the situation, here there is no snip on the leg, because this picture is about the one made first, using moldes, in the one with egg shape I had to cut diagonally.

About how make trousers:

Heat foam on iron, when it became soft model it, I use a large barrel marker, and try to to wrinkle it a bit to give a wearing look like.


For the first Harry, the one made with the molds I didn't put the sphere at the height of the pelvis but I made a modification to the neck/body pattern, but then I said, perhaps with a sphere besides being simpler, it has more consistency , even if on the hips, up to the head then in addition to the roll of eva rubber there is nothing so the neck then swings a bit it doesn't bother me, but alternatively inside you could add a cone or polystyrene or a cardboard cone, which does not come out of the neck. As I told before it should be better if you cut streight because is more confortable than to glue together legs, and I think also could change stability of the character at the end, anyway I glued on a base to be sure (after I end all work)


In the first attempt the collar of the shirt was a little big so in the pattern and in the video you will see the right one. The tie, so I heated the piece of the tie on the iron and with tweezers or a flat awl, I created a sort of hollow to give the idea of a knot, in the part of the knot with the heat of the iron it slightly curved.  I painted the red stripes with a brush.

I stopped the shirt in the pants with two 3 points of glue.

I have always drawn the lines on the bottom of the sweater and on the V of the neckline for the sweater, forgive the unsteady hand, they will surely be more precise for you.


Naturally I always paint afterwards, to model the sweater I used a polystyrene cone but you can do without it, as I said later I painted and closed on the back and then put it on, in my opinion it is easier this way than directly on it, you risk to mess with glue. Then on the front and back I gave a dot of glue to stop the sweater from moving.

Fixed at the back of the neck, we can move on to the coat.
I didn't take any more photos, maybe I'll take some screenshots from the video, but I wanted to say that you learn about foam rubber as you create it, and that you practice, a bit like all techniques, actually. Why do I say this? Because the first one I put on the hat first and then the arms, and it's tight at the shoulders and I dirty the work, instead I modeled the sleeves a little on the shoulder part (where it will be attached) and then I attached the hat.


For the sleeves I left them puffy, in fact compared to all the other sleeve patterns they are double, for the hat I made the part of the lining (red) which I would define as optional, I heated the red part, and I enlarged it, same thing with the hat, and I gave the wrinkled effect which I must say I really like, also to the cape and then we glue the cape then the arms and then the hat.

The head, the head I inserted some strands in the pattern but you can cut many shapes of elongated leaves and proceed from the bottom to the other, a little lower than the ears (previously heated to make them rounder) and from there going up front starting from the bangs and going up behind I put different strands to hide "the meeting point" between the front and back of the hair, I made the scar only on the first, for the eyebrows I used a brown marker, for paint the eyes in white and green acrylic, for the contours of the eyes and for the mouth I used red and black indelible pens.
As soon as I edit video and I'll upload in Youtube I will add it here, I hope I didn't make too much mistake with my english, 
and I hope you enjoyed this project.
Lot of love
Betty.


sabato 21 gennaio 2023

Gomma crepla: Harry Potter (post in italiano)


Ciao a tutti, 

eccomi tornata alla gomma crepla/gomma eva/ musgummi/fommy, in programma ho diversi personaggi, e pian piano cercherò di realizzarli, questo mi è stato richiesto, assieme al prossimo che non vi svelo ora.

 Per questo progetto, siccome le cose da dire sono tante ho deciso di fare due post, uno in italiano e l'altro in inglese.

Inizio con l'elenco dei materiali:

colori usati:

  • color pelle/ incarnato
  • nero
  • bianco
  • grigio
  • giallo scuro- giallo girasole
Ho aggiunto anche una base in seguito con della gomma crepla stampata, in quanto alcuni personaggi, come in questo caso hanno del peso maggiore sulle spalle (cappotto/mantello), e siccome le uova lì dove andiamo a fissare la gamba è più sottile, non riesce a stare in piedi, molto dipende dai personaggi, Per Conan e Arale e per altri personaggi questo problema non c'é ma per altri ho dovuto necessariamente aggiungere una base, d'altronde anche le action figure dei personaggi hanno una base... Ho provato a metterci dei tacchi e devo dire che l'idea funziona, ma ugualmente poco stabile, quindi la base è la soluzione più veloce ed efficace. Una opzione potrebbe essere quella di usare o due sfere una più grande e una più piccola tagliare una piccola parte della cupola e poi tagliare oltre la metà in modo che abbia più peso e avremo un piede più cicciotto oppure usare un mezzo uovo di legno per dare peso alla base.

Avremo poi bisogno di:
  • colla a caldo
  • ferro da stiro o piastra per i capelli
  • forbici grandi e piccole
  • cutter
  • penne indelebili
  • colori acrilici
  • pennelli
  • un pennarello o un tubicino sul quale modellare i pantaloni
  • punteruolo o stecchino per spiedini
  • fil di ferro
  • tronchesino e pinza
  • sfera da 5cm in polistirolo(oppure stampo piccolo per il viso vedi video) 
  • sfera da 3 cm in polistirolo
  • uova preferibilmente 2  da 3x5 cm o uova di legno oppure sfere per creare i piedi
  • cartamodello


Ogni volta che creo un nuovo personaggio, ho bisogno di fare un campione, spesso mi vengono chiesti modelli che si potrebbero pian piano creare da soli, partendo da un modello precedente, la gomma crepla al contrario della carta si può modellare con più facilità ma proprio per questo è meno perfetta rispetto ad essa, infatti ogni creazione è assolutamente originale pur realizzando lo stesso soggetto, il cartamodello o meglio il taglio deve esser sistemato a seconda della situazione.
 
Nella realizzazione durante il video si vede che ho un attimo di difficoltà a fissare le gambe sulla sfera, in quanto il pezzo del pantalone ha gli angoli tagliati, nel cartamodello ho modificato sebbene si vedono gli angoli di come era prima, io vi consiglio di incollare fino al punto dove io ho tagliato il triangolo e dopo aver fissato le gambe incollare la parte del bacino.

ho dimenticato di scrivere sul cappello, pezzo che sembra una corona, quello è il cappello visto a testa in giù, i pezzi del corpo/collo e le gambe vanno arrotolate ho messo la "h" per indicare l'altezza quindi va arrotolato come si vede a sinistra del pezzo.


Inizio sempre dai piedi, mi trovo più comoda così, e quindi vi dico come faccio io, poi ognuno trova il modo più congeniale. Io vi consiglio due uova io ho tagliato a metà, ma come dicevo prima potete tagliare più della metà... in ogni caso uno conviene tenerlo per termoformare, perché comunque quando termoformi da un lato si rovina un pochino.

Nota stampi handmade:
 
come dico nel video, ogni tanto me li chiedono gli stampi, non sono necessari, io non riesco a stringere bene ed essere abbastanza veloce, e quindi li ho creati, e ogni marca, è diversa. Ho finito le uova in polistirolo di questa dimensione, appena possibile ne devo acquistare altri, che se sono fortunata e corrisponde come misure state certi che lo stampo sarà comunque da rifare perché non saranno della stessa dimensione. E comunque dopo un po' di volte sono da rifare, io li uso solo per i video, visto che uso sempre lo stampo sia per i piedi che per le mani. 

Un altro modo che trovo comodo, e l'ho detto in tutti i post precedenti dove parlo di gomma crepla, è quello di segnare e tagliare prima tutti i pezzi, questo solitamente quando lavoro con gli stampi specialmente perché preferisco avere tutti i pezzi pronti e accendere il ferro da stiro meno volte possibile, non lo lascio acceso, che tra lui e la pistola della colla a caldo fanno a gara chi mi ustiona di più... Io che sono tendenzialmente maldestra...


Ecco vedete sopra gli angoli mancanti? Ecco voi tagliate dritto in modo da andar più comodi ad incollare e chiudere poi il pantalone in vita, incollate però fino all'altezza dell'angolo che qui manca, quindi 1-1.5cm prima fermatevi.

Quindi procediamo con termoformare i piedi, se siete precisi non c'è bisogno del solito bordino da 0.5cm intorno alla scarpa.
Poi create le gambe, arrotolando come vi dicevo prima. 
Tagliate dei pezzi di fil di ferro da 11 cm circa, deve essere di un paio di cm in più rispetto alla gamba stessa in quanto un cm va nella scarpa e uno o poco più nel bacino.

Consiglio furbo: non mettete la colla proprio alla fine del rotolino ma 5-6mm più all'interno, schiacciando non avrete fuoriuscita di colla.
 Per i personaggi come questo che comunque ha la gamba completamente coperta potete anche usare un colore differente di gomma crepla, tanto non si vedrà.

Nel momento in cui sono andata ad infilzare la gamba sul piede il rotolino non poggiava tutto sul piede quindi ho tagliato un pochino in diagonale, per la versione con gli stampi no perchè quello ha la caviglia, con l'uovo no.


Vedete questa dovrebbe essere la situazione ora. In questa foto non c'è il dettaglio del taglio obliquo perché la foto è stata scattata quando ho realizzato il primo, ossia quello con gli stampi, invece con le uova in quel punto è molto più basso sulla parte del tallone.

Vediamo come termoformare i pantaloni:

Io mi aiuto con un pennarello quelli larghi per modellare il pantalone.

scaldiamo sul ferro e quando vediamo che diventa morbido, lo modelliamo sul colore...

Io non so se sia una caratteristica del fommy di colore nero, ma a me tende a bruciare o incollarsi sul ferro...

Quindi togliamo dal ferro e arrotoliamo sul pennarello e lo schiacciamo verso il basso in modo da creare quell'effetto sgualcito/indossato, io all'inizio non lo facevo e sembravano poco realistici, devo dire che specie nel secondo tentativo questo effetto mi piace particolarmente sul cappotto/mantello

Per non tenere con una mano il ferro e con l'altra il fommy poi mi son creata una sorta di base di appoggio con una scatola, comodo, molto più comodo così.


Sempre il triangolino di cui vi parlavo prima , ecco come risulta indossato il pantalone. Per il primo Harry, quello realizzato con gli stampi non ho messo la sfera all'altezza del bacino ma ho fatto una modifica al cartamodello del collo/corpo, ma poi ho detto, forse con una sfera oltre ad essere più semplice, ha più consistenza, anche se sui fianchi, fino alla testa poi oltre al rotolino di gomma eva non c'è nulla quindi il collo poi dondola un po' a me non da fastidio, ma in alternativa all'interno si potrebbe aggiungere un cono o in polistirolo o un cono in cartoncino, che non fuoriesca su dal collo, ovvio.


Allora nel primo tentativo il colletto della camicia era un pochino grande quindi nel cartamodello e nel video vedrete quello giusto. La cravatta, allora ho scaldato il pezzo della cravatta sul ferro e con una pinzetta o con il punteruolo di piatto, ho creato una sorta di incavo per dare l'idea del nodo, nella parte del nodo con il caldo del ferro si è leggermente curvata, ho dipinto le strisce rosse con un pennello.

La camicia l'ho fermata nei pantaloni con due 3 punti di colla.

Il maglione le righe che ci sono sul fondo del maglione e sulla V della scollatura li ho disegnati sempre con gli acrilici, perdonate la mano non ferma, a voi sicuramente verranno più precise.


Naturalmente io dipingo sempre dopo, per modellare il maglione ho usato un cono di polistirolo ma potete fare benissimo a meno, come dicevo in seguito ho dipinto e chiuso sul retro e poi fatto indossare, secondo me è più facile così che direttamente addosso, si rischia di pasticciare con la colla. In seguito sul davanti e sul retro ho dato un punto di colla per fermare il maglione perché si muoveva.

Sistemato sul retro del collo, possiamo passare al cappotto.
Non ho fatto altre foto, magari farò degli screenshot dal video, ma ci tenevo a dire che per la gomma crepla si impara man mano che si crea, e che si fa pratica, un po' come per tutte le tecniche a dire il vero. Perché dico questo? Perché il primo ho messo prima il cappello e poi le braccia, e risulta stretto di spalle e ho sporcato il lavoro, invece le maniche le ho modellate un po' sulla parte della spalla (dove andrà attaccata) e dopo ho attaccato il cappello.

Per le maniche le ho lasciate gonfie, infatti rispetto a tutti gli altri cartamodelli di maniche sono il doppio, per il cappello ho fatto la parte della fodera (rosso) che io definirei opzionale, io ho scaldato la parte rossa (tipo una mezzaluna) e l'ho allargata, stessa cosa col cappello, e ho dato l'effetto stropicciato che devo dire mi piace molto, anche al mantello e quindi incolliamo il mantello poi le braccia e poi il cappello.

La testa, la testa ho inserito nel cartamodello delle ciocche ma potete tagliare delle forme di foglie allungate, tante, e procedete dal basso verso l'altro, pochino più in basso rispetto alle orecchie (precedentemente scaldate per renderle più tonde) e da lì si sale davanti si parte dalla frangia e si sale dietro ho messo delle ciocche diverse per nascondere  "il punto di incontro" tra davanti e dietro dei capelli, la cicatrice l'ho fatta solo sul primo, per le sopracciglia ho usato un pennarello marrone, per dipingere gli occhi acrilico bianco e verde, per i contorni degli occhi e per la bocca ho usato penne indelebili rossa e nera.


E per adesso è tutto credo, aggiungerò il video appena sarà on line, ancora sono in fase di editing, il programma che ho mi rende il compito a dir poco arduo, che si blocca e se non mi ricordo di salvare perdo il lavoro fatto, e devo ricominciare, credetemi mi scoraggia editare, ma non posso pubblicare video di ore e ore. Ora scrivo anche il post per gli amici di lingua straniera. 
Se avete letto il post sin qua vi ringrazio doppiamente. 
Grazie
Buona serata.

Betty

sabato 14 gennaio 2023

pezzi piccoli di carta, come creare delle bordure per abbellire i junk journals /little scraps how I create borders to embellish my junk journals

Salve a tutti , oggi condivido con voi queste semplici bordure realizzate con piccoli scampoli di carta.

Hi everyone, today I want to share with you these simple paper borders  (edge) made with little scraps of paper.

Nella foto in alto poteve vedere alcune fasce cucite con solo pezzi di carta scrap, nella foto qui a sinistra invece ho utilizzato sia delle etichette e fustellate. 

In the photo up you can see some bands I sewed together with paper scraps only, in the photo on the left I added also some diecuts and labels
Questa invece è stata un esperimento, ho cucito nello stesso modo solo fiori, devo dire che l'effetto è molto carino, nel video vi mostro sia come le ho cucite sia come eventualmente incollarle, nel caso non abbiate una macchina da cucire.

This is an experiment, I sewed together only flowers, I have to say this is very cute, in the video I show you how I saw them and also how I glue them in case you don't have sewing machine.

Ho anche fatto una prova con dei cuori che ho precedentemente distressato con gli oxide, anche questo effetto mi piace molto, inoltre credo sia un modo fantastico di utilizzare i pezzi più piccoli e quelle fustellate monocolore, altre fustellate le ho abbellite disegnando con le matite colorate...

I also did a test with some hearts that I previously distressed with oxides, I really like this effect too, and I think it's a fantastic way to use the smaller pieces and those single-color die-cuts, other die-cuts I embellished them by drawing with colored pencils ...
con i cuori, with hearts shape

Queste bordure/fasce le utilizzo per abbellire i miei Junk journal, da incollare sul bordo della pagina, o come abbellimento per i passanti, o sulle tasche o sulle tags, certo possiamo fustellare delle bordure, usare anche dei merletti ma creare qualcosa con gli scampoli di carta è più interessante. 
Nel video mostro anche altri tipi di bordure realizzate sia in carta che in stoffa che volendo si possono anche cucire a mano (almeno quelle in stoffa sicuro), sono tutte semplici idee che rendono il nostro junk più interessante e unico. 

I use these borders/bands to embellish my Junk journals, to glue on the edge of the page, or as an embellishment for belly bands, or on pockets or tags, of course we can die-cut borders, also use laces but create something with the scraps of paper is more interesting.
In the video I also show other types of borders made both in paper and in fabric that you can also sew by hand if you want (at least those in safe fabric), they are all simple ideas that make our junk more interesting and unique.

Qui ad esempio sul mio mini junk journal sul bordo della pagina. 
Di solito quando cucio le fasce le taglio a misura, io realizzo junk utilizzando pagine A4 piegate a metà (A5) quindi taglio di 21cm la fascia di carta o il pezzo di nastro per non dover tagliarle e quindi incollare poi la carta visto che tagliando il filo potrebbe scucirsi.

Here for example on my mini junk journal, on the edge of a page.
I use to cut strips of paper or ribbon as long as the page is, I realize junk journal with A4 size paper fold in half, so I cut strips of 21cms, just because if I sew them and I cut a longer strip to the right size later, stitches can unstitch and you must glue or put masking tape on the back.


Qui sul junk grande, sul bordo della pagina, nella foto seguente su una tasca e nella successiva su una tag... Solo alcuni esempi.


here on my big junk journal, on the edge of this page, in next one on a pocket and in the other one on a tag. Just few examples.

Grazie a tutti, a presto. un bacione Betty
Thank everyone, to soon. A big kiss Betty