Ciao a tutti, oggi vi mostro questa semplicissima busta in vinile, ne ho realizzate un po' e altre dovrò crearne, perché finora credo di poter affermare che sia la soluzione migliore che io abbia trovato per conservare le fustelle.
Avevo fatto un video, quasi un vlog dove per circa 9 minuti ... poi ho detto "stavolta faccio un video veloce che magari è più immediato, poi scrivo tutto per bene nel blog." Ed eccomi qui.
Come ho detto altre volte credo che il catalogare e organizzare il materiale creativo sia una cosa complicata e assolutamente soggettiva, ciò che io trovo pratico per te magari non lo sarà e viceversa.
Io sono alla continua ricerca del modo migliore per catalogare il materiale e gli attrezzi qui nella stanza creativa. Quando ho iniziato ad acquistare le fustelle ho sistemato le bigz e le sizzlits come se fossero dei libri, anche le embossing folder al momento sono da sistemare perché messe in una scatola come sono al momento non mi piacciono molto, forse andranno nelle borse che attualmente contengono le fustelle più grandi, sto studiando il sistema migliore, vi aggiornerò.

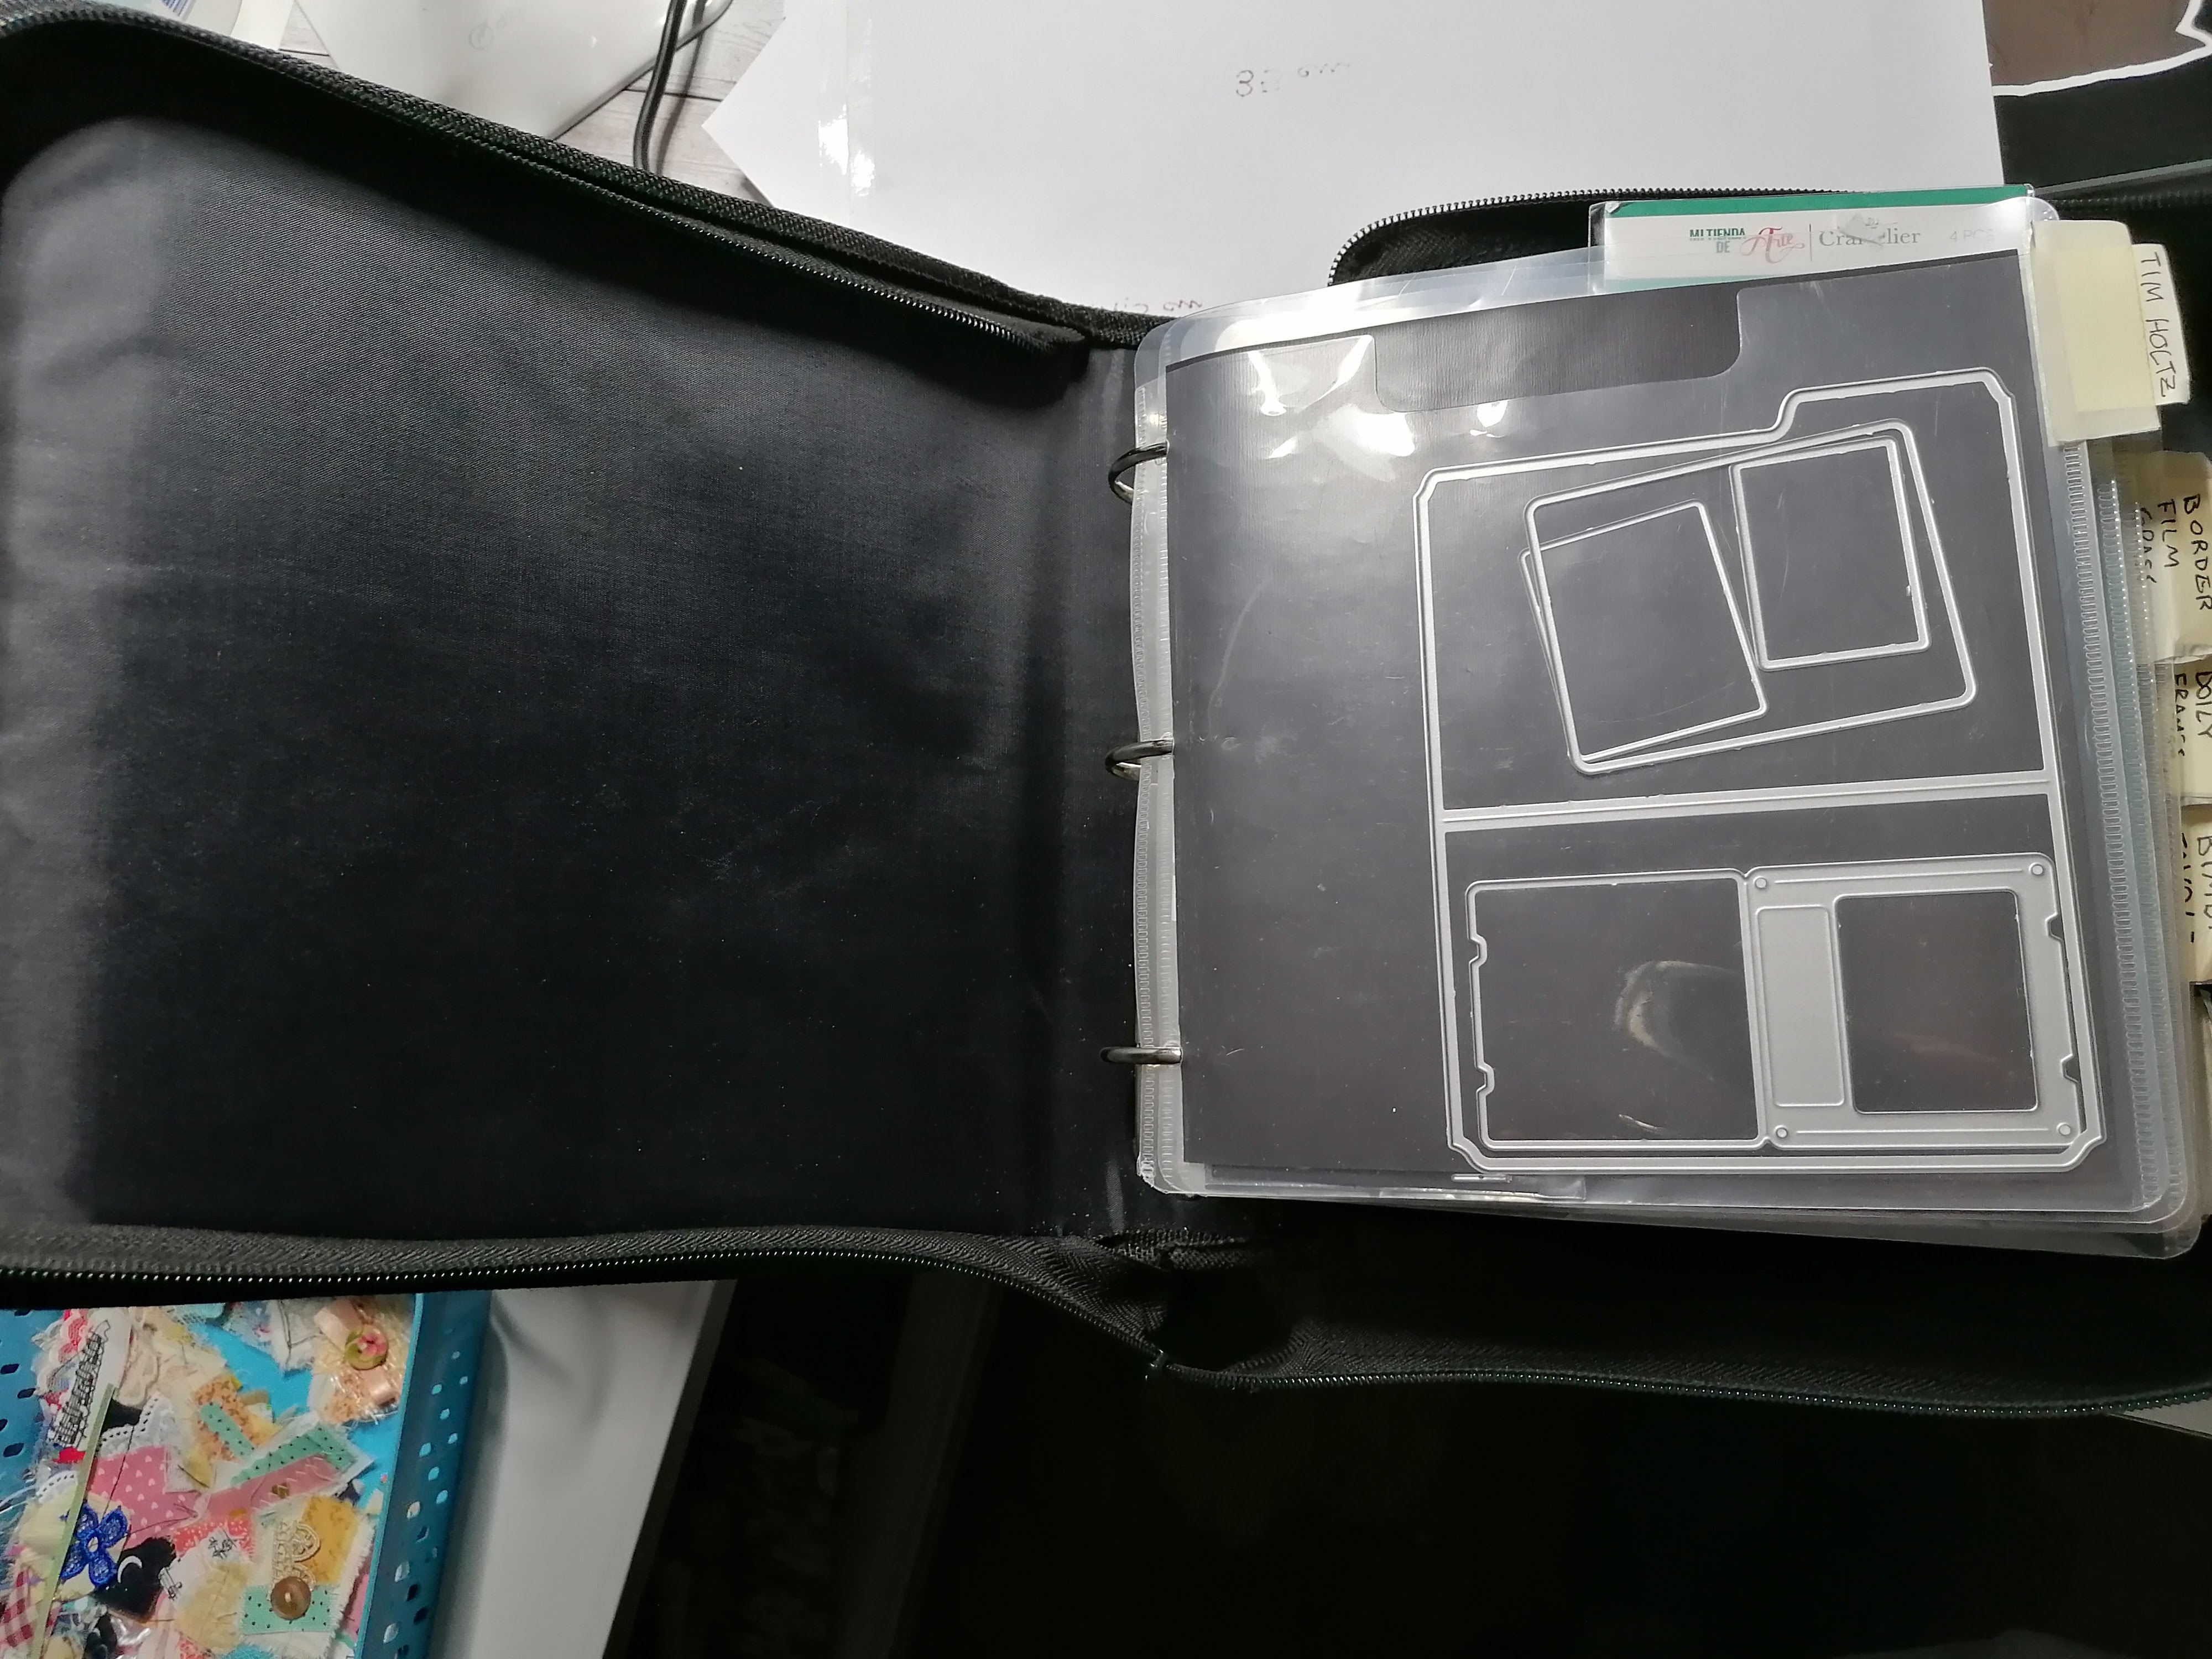
Prima di arrivare a queste borse, avevo creato una sorta di album con delle pagine sulle quali avevo attaccato del nastro magnetico e ogni volta per cercare la fustella che mi serviva, cadevano fustelle, perché il potere magnetico sia dei nastri che dei fogli è molto blando. Allora vidi queste borse/raccoglitore, hanno gli anelli come un normale raccoglitore e sono indicate sia per fustelle che per timbri, ogni tasca contiene un foglio magnetico che dovrebbe reggere le fustelle, dico "dovrebbe" perché comunque non stanno al loro posto. Al momento in una ho le fustelle più grandi che comunque hanno pezzi più piccoli che sono chiusi all'interno di una bustina di plastica di quelle con la zip e a loro volta su un foglio magnetico. Sperando che fosse più comoda acquistai quella con le 6 tasche per pagina, le fustelle stanno più ferme ma, come direbbe qualcuno "bene ma non benissimo" perché io uso le pagine da entrambi i lati e sul lato B della pagina le tasche in basso hanno accesso solo davanti e quindi devi tirare fuori il foglio magnetico e prendere le fustelle. Assolutamente migliori dell'album che avevo fatto e anche delle bustine portadocumenti che avevo fatto con delle tasche che molto ricordano le buste in queste borse e che prima di scoprire questi raccoglitori, mi hanno chiesto in molte, e nel canale dovrebbe esserci ancora il video.

Ecco tra le due borse tutto sommato preferisco questa, per il momento sono ferma a questa soluzione, 2 raccoglitori/borsa con tabs che mi facilitano la ricerca e una cassetta (acquistata dal Lidl) dove ho sistemato le bustine che ho fatto io e quelle che ho acquistato direttamente con le fustelle.
Le tasche grandi... notare come i pezzi più piccoli si spostino...
E queste sono le buste che ho acquistato con le fustelle e mettendo un pezzo di cartoncino e un foglio magnetico, o il nastro che ho recuperato dall'album disfatto, devo dire che stanno a loro posto e sono pratiche, ora sto pensando di aggiungere un'immagine della fustella sopra in modo da trovarle più agevolmente.
Il problema è che non ho tutto in una categoria, mi spiego, Vedi borsa prima ci sono le farfalle, tra le fustelle grandi anche quelle fustelle con timbro della sizzix ad esempio (sono nell'altra borsa) e poi le altre sono in queste bustine, vorrei avere tutto diviso per tema, tutti i fiori, tutti gli animali, ecc. tutti in un posto e non divisi, ed ecco il motivo del video che avevo registrato chiedendovi un consiglio.
Di queste cassette ne ho due, una da svuotare e questa, pensavo di prenderne un'altra e catalogare tutto per argomento in queste cassette che sono della misura delle buste che ho realizzato e che trovo con le fustelle.
Per creare le bustine ho usato del vinile, o meglio quelle tovaglie che si trovano facilmente nei negozi di casalinghi, quelle trasparenti, nessuno ci vieta di realizzarle in stoffa, io volevo che fossero trasparenti perché intendevo proprio catalogare fustelle.
Il trasparente in video si vede poco, in foto anche peggio quindi all'inizio del video ho messo una sorta di cartamodello.
Ho tagliato un rettangolo di vinile che misurava 35cm x 15cm, e ho ottenuto una busta 15cm larga e 14 alta, come potete vedere dalla foto a 13.5 cm ho piegato la prima volta, poi ho trovato il centro (7.5cm) e ho ottenuto la forma della bustina, piegando i 13,5 sulla parte di 14.5 facciamo un segno 1cm più su e si ottiene l'inclinazione del triangolo della busta, quando vado a cucire quel cm che abbiamo calcolato in più fa piegare al meglio la parte superiore della busta.
Ho fatto prima il punto sul lato dritto da 15cm poi ho piegato e cucito tutto intorno, con il punto zig zag, che oltre ad essere più sicuro per quanto riguarda la cucitura è anche decorativo, ho messo il bottone con la pinza Kam dello stesso colore del filo usato, per applicare il bottone abbiamo bisogno di un punteruolo, una penna indelebile con la quale segnare il punto dove andrà il bottone. Come si applica? Si vede in questo video e nel box ho aggiunto l'altro link al
video precedente in cui di nuovo mostravo come si fa, ad ogni modo abbiamo bisogno di 2 pezzi uguali, quelli che somigliano ad una puntina da disegno, e poi ci sono due altri tipi di bottone che permettono di agganciare, la parte che somiglia alla puntina va all'interno della busta e l'latro tipo su, schiacciando con la pinza la parte concava, che nella mia pinza è di colore nero va con la parte che somiglia ad una puntina, la parte di gomma trasparente va sulla parte che poi chiuderà, schiacciando il chiodino si schiaccia e si blocca, uguale dall'altro lato, vedi bene nel video.
Per la versione con velcro il primo fatto lo avevo sbagliato, la parte che chiudeva la busta restava fuori dal triangolo, cioè il velcro non era completamente coperto dal vinile, quindi prendiamo la misura in base ad esso, vi mostro una foto per meglio spiegare dove ho sbagliato.
Ho dovuto tagliare gli angoli del velcro perché uscivano dal top della busta. Quindi prima di cucire quello sulla busta prendiamo la misura in base alla parte superiore.
Cuciamo prima la parte morbida del velcro sulla parte dritta appena decorata con il punto a zig zag. Io mi segno dei punti con una penna indelebile e cucio, una volta chiusa la busta cucio la seconda parte del velcro, quella più ruvida.
Ho aperto un profilo su
Ko-fi, ancora non lo conosco bene, ma proverò a caricare cartamodelli, foto ecc anche lì, se voleste offrirmi un caffè e farmi sapere che apprezzate quello che faccio...
Credo che per il momento sia tutto, se volete condividere con me come catalogate e conservate le vostre fustelle, fatemelo sapere con un commento.
Buona giornata e buona creatività.
con affetto. Betty